- How do I pretty format XML?
xmllint --output newFile.xml --format oldFile.xml - How do I use tabs instead of spaces to format XML?
XMLLINT_INDENT=$'\t' xmllint --output newFile.xml --format oldFile.xml - How do I validate an XML against a DTD?
xmllint --dtdvalid http://java.sun.com/j2ee/dtds/web-app_2_2.dtd web.xml - How do I validate against a XSD schema?
xmllint --debugent --schema http://java.sun.com/xml/ns/j2ee/web-app_2_4.xsd web.xml
2013-03-13
xmllint: Format and Validate XML on Unix
xmllint can be used in Unix to format and validate XML.
2013-03-12
Android ListView Tutorial: simple_list_item_2 and SimpleAdapter
This tutorial demonstrates how to display an array of Java enum in the Android UI. This example is also applicable if using an array or List of JavaBeans or plain Java Objects.
Core Concepts Covered
1. Create class extending android.app.ListActivity.
For this tutorial, we will use an enum containing the 13 US original colonies. View the full UsState.java code listing.
private String stateName;
}
Each element in the List will correspond to a row in the Android UI list. The Map<String, String> maps the attributes on the Object to the android.R.id.text1 and android.R.id.text2 UI fields.
For example, if you input
4. Create an android.widget.SimpleAdapter in the ListActivity class from step 1 that connects the List<Map<String, String>> data to android.R.layout.simple_list_item_2.
View the full MainActivity.java code listing.
The final result will look like this

Source Code: Git | SVN | Download Zip
Core Concepts Covered
- Use the built-in android.R.layout.simple_list_item_2 to create an Android UI List.
- Use android.widget.SimpleAdapter to display an array of Java enum in the Android UI List.
- Create class extending android.app.ListActivity.
- Obtain data as an array of Java enum entries.
- Convert the array of enum into a List<Map<String, String>> format that will be used by the android.widget.SimpleAdapter constructor.
- Create an android.widget.SimpleAdapter that connects the List<Map<String, String>> data to android.R.layout.simple_list_item_2.
- Bind the android.widget.ListAdapter using the ListActivity.setListAdapter method.
1. Create class extending android.app.ListActivity.
public class MainActivity extends ListActivity {
@Override
protected final void onCreate(final Bundle savedInstanceState) {
super.onCreate(savedInstanceState);
}
}
For this tutorial, we will use an enum containing the 13 US original colonies. View the full UsState.java code listing.
public enum UsState {
DE("Delaware"),
PA("Pennsylvania"),
NJ("New Jersey");
private UsState(final String name) {
this.stateName = name;
}
public String getStateName() {
return this.stateName;
}
public String getAbbreviation() {
return this.name();
}
}
3. Convert the array of enum into a List<Map<String, String>> format that will be used by the android.widget.SimpleAdapter constructor.
private static final String TEXT1 = "text1";
private static final String TEXT2 = "text2";
private static final String TEXT2 = "text2";
private List<Map<String, String>> convertToListItems(final UsState[] states) {
final List<Map<String, String>> listItem =
new ArrayList<Map<String, String>>(states.length);
for (final UsState state: states) {
final Map<String, String> listItemMap = new HashMap<String, String>();
listItemMap.put(TEXT1, state.getStateName());
listItemMap.put(TEXT2, state.getAbbreviation());
listItem.add(Collections.unmodifiableMap(listItemMap));
}
return Collections.unmodifiableList(listItem);
}
The convertToListItems method converts an array of UsState into a List of Map. The List of Map will be used as part of the constructor for a SimpleAdapter.
For example, if you input
UsState[] =
[ DE("Delaware"),
PA("Pennsylvania"),
NJ("New Jersey")
];
the output will be
List<Map<String, String>> =
[ {text1="Delaware", text2="DE"},
{text1="Pennsylvania", text2="PA"},
{text1="New Jersey", text2="NJ"}
];
private ListAdapter createListAdapter(final UsState[] states) {
final String[] fromMapKey = new String[] {TEXT1, TEXT2};
final int[] toLayoutId = new int[] {android.R.id.text1, android.R.id.text2};
final List<Map<String, String>> list = convertToListItems(states);
return new SimpleAdapter(this, list,
android.R.layout.simple_list_item_2,
fromMapKey, toLayoutId);
}
In the createListAdapter method, the constructor of the SimpleAdapter binds the keys from the Map<String, String> created in convertToListItems to the android.R.id.text1 and text2. It associates "text1" from the fromMapKey array to the android.R.id.text1 in the toLayoutId array. When the ListView needs to show text for the android.R.id.text1 ID, it executes a Map.get("text1") to get the String value to display, e.g. Delaware.
5. Bind the android.widget.ListAdapter using the ListActivity.setListAdapter method.
public class MainActivity extends ListActivity {
@Override
protected final void onCreate(final Bundle savedInstanceState) {
super.onCreate(savedInstanceState);
final UsState[] states = UsState.values();
final UsState[] states = UsState.values();
final ListAdapter listAdapter = createListAdapter(states);
setListAdapter(listAdapter);
}
}
The final result will look like this

Source Code: Git | SVN | Download Zip
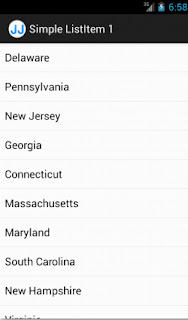
Android ListView Tutorial: simple_list_item_1
This tutorial demonstrates how to display a Java List of Strings in the Android UI. This example is also applicable if using an array of Strings.
Core Concepts Covered
1. Create class extending android.app.ListActivity.
For this tutorial, we will use a List of Strings containing the 13 US original colonies. View the full UsState.java code listing.
3. Create an android.widget.ArrayAdapter in the ListActivity class from step 1 that connects the List of Strings data to android.R.layout.simple_list_item_1.
View the full MainActivity.java code listing.
The final result will look like this
Source Code: Git | SVN | Download Zip
Core Concepts Covered
- Use the built-in android.R.layout.simple_list_item_1 to create an Android UI List.
- Use android.widget.ArrayAdapter to display a List of Strings data in the Android UI List.
- Create class extending android.app.ListActivity.
- Obtain data in List of Strings data structure.
- Create an android.widget.ArrayAdapter that connects the List of Strings data to android.R.layout.simple_list_item_1.
- Bind the android.widget.ListAdapter using the ListActivity.setListAdapter method.
1. Create class extending android.app.ListActivity.
public class MainActivity extends ListActivity {
@Override
protected final void onCreate(final Bundle savedInstanceState) {
super.onCreate(savedInstanceState);
}
}
For this tutorial, we will use a List of Strings containing the 13 US original colonies. View the full UsState.java code listing.
public final class UsState {
public static final List<String> ORIGINAL_COLONIES = initColonies();
private UsState() { }
private static List<String> initColonies() {
final List<String> colonies = new ArrayList<String>();
colonies.add("Delaware");
colonies.add("Pennsylvania");
colonies.add("New Jersey");
return Collections.unmodifiableList(colonies);
}
}
private ListAdapter createListAdapter(final List<String> list) {
return new ArrayAdapter<String>(this, android.R.layout.simple_list_item_1, list);
}
4. Bind the android.widget.ListAdapter using the ListActivity.setListAdapter method.
public class MainActivity extends ListActivity {
@Override
protected final void onCreate(final Bundle savedInstanceState) {
super.onCreate(savedInstanceState);
final ListAdapter listAdapter = createListAdapter(UsState.ORIGINAL_COLONIES);
setListAdapter(listAdapter);
}
}
The final result will look like this

Source Code: Git | SVN | Download Zip
2013-03-07
Built-in Android ListView layouts: Part 2
See Part 1 here.
Android has several built-in ListView layouts that you can easily use without defining your own layout XML.
The source code needs cleanup and better documentation but it should give you an idea how to use the built-in layout.
Android has several built-in ListView layouts that you can easily use without defining your own layout XML.
The source code needs cleanup and better documentation but it should give you an idea how to use the built-in layout.
|
android.R.layout.simple_list_item_activated_1
| |
| Source Code: Git | SVN | |

|
<?xml version="1.0" encoding="utf-8"?> <TextView xmlns:android= "http://schemas.android.com/apk/res/android" android:id="@android:id/text1" android:layout_width="match_parent" android:layout_height="wrap_content" android:textAppearance= "?android:attr/textAppearanceListItemSmall" android:gravity="center_vertical" android:paddingStart= "?android:attr/listPreferredItemPaddingStart" android:paddingEnd= "?android:attr/listPreferredItemPaddingEnd" android:background= "?android:attr/activatedBackgroundIndicator" android:minHeight= "?android:attr/listPreferredItemHeightSmall" /> |
|
android.R.layout.simple_list_item_activated_2
| |
| Source Code: Git | SVN | |
 |
<?xml version="1.0" encoding="utf-8"?>
<TwoLineListItem
  xmlns:android=
  "http://schemas.android.com/apk/res/android"
  android:paddingTop="2dip"
  android:paddingBottom="2dip"
  android:layout_width="match_parent"
  android:layout_height="wrap_content"
  android:background=
  "?android:attr/activatedBackgroundIndicator"
  android:minHeight=
  "?android:attr/listPreferredItemHeight"
  android:mode="twoLine"
>

  <TextView android:id="@android:id/text1"
    android:layout_width="match_parent"
    android:layout_height="wrap_content"
    android:layout_marginStart=
    "?android:attr/listPreferredItemPaddingStart"
    android:layout_marginTop="6dip"
    android:textAppearance=
    "?android:attr/textAppearanceListItem"
  />

  <TextView android:id="@android:id/text2"
    android:layout_width="match_parent"
    android:layout_height="wrap_content"
    android:layout_below="@android:id/text1"
    android:layout_alignStart="@android:id/text1"
    android:textAppearance=
    "?android:attr/textAppearanceSmall"
  />

</TwoLineListItem>
|
|
android.R.layout.simple_list_item_checked
| |
| Source Code: Git | SVN | |

|
<?xml version="1.0" encoding="utf-8"?> <CheckedTextView xmlns:android= "http://schemas.android.com/apk/res/android" android:id="@android:id/text1" android:layout_width="match_parent" android:layout_height= "?android:attr/listPreferredItemHeightSmall" android:textAppearance= "?android:attr/textAppearanceListItemSmall" android:gravity="center_vertical" android:checkMark="?android:attr/textCheckMark" android:paddingStart= "?android:attr/listPreferredItemPaddingStart" android:paddingEnd= "?android:attr/listPreferredItemPaddingEnd" /> |
|
android.R.layout.simple_list_item_multiple_choice
| |
| Source Code: Git | SVN | |

|
<?xml version="1.0" encoding="utf-8"?> <CheckedTextView xmlns:android= "http://schemas.android.com/apk/res/android" android:id="@android:id/text1" android:layout_width="match_parent" android:layout_height= "?android:attr/listPreferredItemHeightSmall" android:textAppearance= "?android:attr/textAppearanceListItemSmall" android:gravity="center_vertical" android:checkMark= "?android:attr/listChoiceIndicatorMultiple" android:paddingStart= "?android:attr/listPreferredItemPaddingStart" android:paddingEnd= "?android:attr/listPreferredItemPaddingEnd" /> |
|
android.R.layout.simple_list_item_single_choice
| |
| Source Code: Git | SVN | |

|
<?xml version="1.0" encoding="utf-8"?> <CheckedTextView xmlns:android= "http://schemas.android.com/apk/res/android" android:id="@android:id/text1" android:layout_width="match_parent" android:layout_height= "?android:attr/listPreferredItemHeightSmall" android:textAppearance= "?android:attr/textAppearanceListItemSmall" android:gravity="center_vertical" android:checkMark= "?android:attr/listChoiceIndicatorSingle" android:paddingStart= "?android:attr/listPreferredItemPaddingStart" android:paddingEnd= "?android:attr/listPreferredItemPaddingEnd" /> |
|
android.R.layout.two_line_list_item
| |
| Source Code: Git | SVN | |

|
<?xml version="1.0" encoding="utf-8"?> <LinearLayout xmlns:android= "http://schemas.android.com/apk/res/android" android:layout_width="match_parent" android:layout_height="wrap_content" android:orientation="vertical"> <TextView android:id="@android:id/text1" android:textSize="16sp" android:textStyle="bold" android:layout_width="match_parent" android:layout_height="wrap_content" /> <TextView android:id="@android:id/text2" android:textSize="16sp" android:layout_width="match_parent" android:layout_height="wrap_content" /> </LinearLayout> |
Built-in Android ListView layouts: Part 1
See Part Two here.
Android has several built-in ListView layouts that you can easily use without defining your own layout XML.
The source code needs cleanup and better documentation but it should give you an idea how to use the built-in layout.
Android has several built-in ListView layouts that you can easily use without defining your own layout XML.
The source code needs cleanup and better documentation but it should give you an idea how to use the built-in layout.
|
android.R.layout.activity_list_item
| |
| Source Code: Git | SVN | |

|
<?xml version="1.0" encoding="utf-8"?>
<LinearLayout
  xmlns:android=
  "http://schemas.android.com/apk/res/android"
  android:layout_width="match_parent"
  android:layout_height="wrap_content"
  android:paddingTop="1dip"
  android:paddingBottom="1dip"
  android:paddingStart="8dip"
  android:paddingEnd="8dip">

  <ImageView android:id="@+id/icon"
    android:layout_width="24dip"
    android:layout_height="24dip"
  />

  <TextView android:id="@android:id/text1"
    android:layout_width="wrap_content"
    android:layout_height="wrap_content"
    android:layout_gravity="center_horizontal"
    android:paddingStart=
    "?android:attr/listPreferredItemPaddingStart"
  />
</LinearLayout>
|
|
android.R.layout.simple_expandable_list_item_1
| |
| Source Code: Git | SVN | |

|
<?xml version="1.0" encoding="utf-8"?> <TextView xmlns:android= "http://schemas.android.com/apk/res/android" android:id="@android:id/text1" android:layout_width="match_parent" android:layout_height= "?android:attr/listPreferredItemHeight" android:paddingStart= "?android:attr/expandableListPreferredItemPaddingLeft" android:textAppearance= "?android:attr/textAppearanceListItem" android:gravity="center_vertical" /> |
|
android.R.layout.simple_expandable_list_item_2
| |
| Source Code: Git | SVN | |

|
<?xml version="1.0" encoding="utf-8"?>
<TwoLineListItem
  xmlns:android=
  "http://schemas.android.com/apk/res/android"
  android:layout_width="match_parent"
  android:layout_height=
  "?android:attr/listPreferredItemHeight"
  android:paddingTop="2dip"
  android:paddingBottom="2dip"
  android:paddingStart=
  "?android:attr/expandableListPreferredItemPaddingLeft"
  android:mode="twoLine"
>

  <TextView android:id="@android:id/text1"
    android:layout_width="match_parent"
    android:layout_height="wrap_content"
    android:layout_marginTop="6dip"
    android:textAppearance=
    "?android:attr/textAppearanceListItem"
  />

  <TextView android:id="@android:id/text2"
    android:layout_width="match_parent"
    android:layout_height="wrap_content"
    android:layout_below="@android:id/text1"
    android:layout_alignStart="@android:id/text1"
    android:textAppearance=
    "?android:attr/textAppearanceSmall"
  />

</TwoLineListItem>
|
|
android.R.layout.simple_list_item_1
| |
| Source Code: Git | SVN | Download Zip | Tutorial | |

|
<?xml version="1.0" encoding="utf-8"?> <TextView xmlns:android= "http://schemas.android.com/apk/res/android" android:id="@android:id/text1" android:layout_width="match_parent" android:layout_height="wrap_content" android:textAppearance= "?android:attr/textAppearanceListItemSmall" android:gravity="center_vertical" android:paddingStart= "?android:attr/listPreferredItemPaddingStart" android:paddingEnd= "?android:attr/listPreferredItemPaddingEnd" android:minHeight= "?android:attr/listPreferredItemHeightSmall" /> |
|
android.R.layout.simple_list_item_2
| |
| Source Code: Git | SVN | Download Zip | Tutorial | |

|
<?xml version="1.0" encoding="utf-8"?>
<TwoLineListItem
  xmlns:android=
  "http://schemas.android.com/apk/res/android"
  android:layout_width="match_parent"
  android:layout_height="wrap_content"
  android:minHeight=
  "?android:attr/listPreferredItemHeight"
  android:mode="twoLine"
>

  <TextView
    android:id="@android:id/text1"
    android:layout_width="match_parent"
    android:layout_height="wrap_content"
    android:layout_marginStart=
    "?android:attr/listPreferredItemPaddingStart"
    android:layout_marginTop="8dip"
    android:textAppearance=
    "?android:attr/textAppearanceListItem"
  />

  <TextView
    android:id="@android:id/text2"
    android:layout_width="match_parent"
    android:layout_height="wrap_content"
    android:layout_below="@android:id/text1"
    android:layout_alignStart="@android:id/text1"
    android:textAppearance=
    "?android:attr/textAppearanceSmall"
  />

</TwoLineListItem>
|
2013-03-04
One simple trick to make WebLogic admin easier
Setting well-known WebLogic paths as Unix environment variables can make daily administration easier. For example,
export WLHOME=/home/weblogic/Oracle/Middleware/user_projects/domains/base_domain
export WLBIN=${WLHOME}/bin
export WLLOG=${WLLOG}/servers/AdminServer/logs
This is preferable to using Unix aliases such as
alias gotolog='cd /home/weblogic/Oracle/Middleware/user_projects/domains/base_domain/servers/AdminServers/logs'
Benefits
- Easy to navigate
Being able to quickly and easily switch between any WebLogic log and bin directory via
cd $WLLOG
cd $WLBIN
makes production debugging much less stressful than fumbling around Oracle WebLogic notoriously long and nested directory structures. This is especially important when you are debugging a real-time production issue on multiple WebLogic Unix servers with your eight bosses watching over your shoulders. - Flexible and reusable
The environment variables can be used in a number of situations.
cd $WLLOG
tail -f $WLLOG/AdminServer.log
ls $WLLOG
tar cvf archiveLogs.tar $WLLOG - Usable by developers
Java developers can get the Unix environment variable via
System.getenv("WLLOG");
They can also directly use it in their bash shell scripts. This makes the same code portable across multiple WebLogic domains and environments without having to modify their code. - Self-documenting
Other admins can type
set | grep "^WL"
and see the real paths for WebLogic. This is helpful if you have to change WebLogic directories or are on a unfamiliar server.
2013-03-03
Ignore Git
- How do I find the global ignore configuration file?
git config --get-all core.excludesfile
(In svn, the global ignore configuration file is al
ways ~/.subversion/config) - How do I create a global ignore file if one is not configured?
git config --global core.excludesfile ~/.gitignore_global
(In svn, just create the text file ~/.subversion/config) - What do I put in the global ignore configuration text file?
You can find examples of .gitignore_global at
https://github.com/github/gitignore/tree/master/Global
(In svn, just add this line into ~/.subversion/config
global-ignores = *.o *.lo *.la *.al .libs *.so *.so.[0-9]* *.a *.pyc *.pyo *.rej *~ #*# .#* .*.swp .DS_Store *.class
) - How do I configure ignores specific to a project?
In the project directory, you can create or edit either the file .git/info/exclude or .gitignore. It has the same format as the global ignore.
(In svn,
Configure .svnignore as local ignore file:
svn propset svn:ignore -F .svnignore /path/to/svn/workspace
Configure just one ignore:
svn propset svn:ignore "files_to_ignore" /path/to/svn/workspace
Configure a group of ignores:
svn propedit svn:ignore /path/to/svn/workspace
View what is ignored
svn propget svn:ignore /path/to/svn/workspace
)
2013-03-02
Android Project .gitignore
# built application files
*.apk
*.ap_

# files for the dex VM
*.dex

# Java class files
*.class

# generated files
bin/
gen/

# Local configuration file (sdk path, etc)
local.properties

# Eclipse project files
.classpath
.project
.settings/
.metadata/

# Proguard folder generated by Eclipse
proguard/

# Intellij project files
*.iml
*.ipr
*.iws
.idea/

# PMD files
.pmd
reports/

# SVN files
.svn/

# Mac OS X
.DS_Store
Unix Environment Variables
- How do I show all my environment variables?
set - How do I show a specific environment variable, like PATH?
set | grep -e "^PATH=" - How do I set an environment variable, like ORACLE_HOME?
export ORACLE_HOME=/usr/oracle - How do I delete a environment variable?
unset ORACLE_HOME - How do I append to an environment variable, like appending /users/sbin to PATH?
export PATH=${PATH}:/users/sbin - How do I reuse other environment variables, like adding ORACLE_HOME to PATH?
export PATH=${PATH}:${ORACLE_HOME} - How do I pass environment variables to Unix shell scripts without changing my environment?
PATH=${PATH}:/usr/local ./myShellScript.sh - How do I make my changes to environment variables permanent?
Create or edit the file ~/.bashrc and add the export command to that file. For example, to make the change to ORACLE_HOME permanent, add the following line to ~/.bashrc
export ORACLE_HOME=/usr/oracle
After saving the file ~/.bashrc, then execute the command
source ~/.bashrc - What is the difference between ~/.bash_profile and ~/.bashrc? Or setting ~/.bashrc did not make my environment variable changes permanent.
For a detailed explanation, please read Josh Staiger's article.
But pragmatically it doesn't matter. Just make ~/.bash_profile execute ~/.bashrc. Create or edit ~/.bash_profile and add the following line
[ -r ~/.bashrc ] && . ~/.bashrc
Generate Ant build.xml for Android project
If you created an Android project in the Android Developer Tools IDE, the build.xml for Ant is not generated by default.
To create an Ant build.xml for an Android project, use the following command
$ANDROID_SDK_PATH/tools/android update project -p projectPath
To see more useful Android command lines, click here.
To create an Ant build.xml for an Android project, use the following command
$ANDROID_SDK_PATH/tools/android update project -p projectPath
To see more useful Android command lines, click here.
PMD-Eclipse Rules Configuration
When I first installed the PMD Eclipse plugin and ran a code check on my codebase, PMD displayed no errors. The first thought was, "My code is perfect!". On second thought, PMD was not configured properly.
Unlike FindBug or CheckStyle, by default PMD is not configured to check for any coding violation rules. (At least this is true on my Mac Eclipse Juno.). You have to go to Eclipse Preferences -> PMD -> Rule Configuration and check the rules you want to use.

Unlike FindBug or CheckStyle, by default PMD is not configured to check for any coding violation rules. (At least this is true on my Mac Eclipse Juno.). You have to go to Eclipse Preferences -> PMD -> Rule Configuration and check the rules you want to use.

Subscribe to:
Posts (Atom)